Well let's just start again without at length width.
- The first thing that most certainly open the Illustrator program beforehand that you have. Here I am using Illustrator CS5. But you can use Illustrator CS3 because there is still the same with Illustrator CS5.
- Then, create a worksheet or to say create a new document by selecting File> New.

- 3.Then it's up to you to make using A4 paper or the other.

- Then select File and then back to the Place ... select the file you have downloaded earlier.

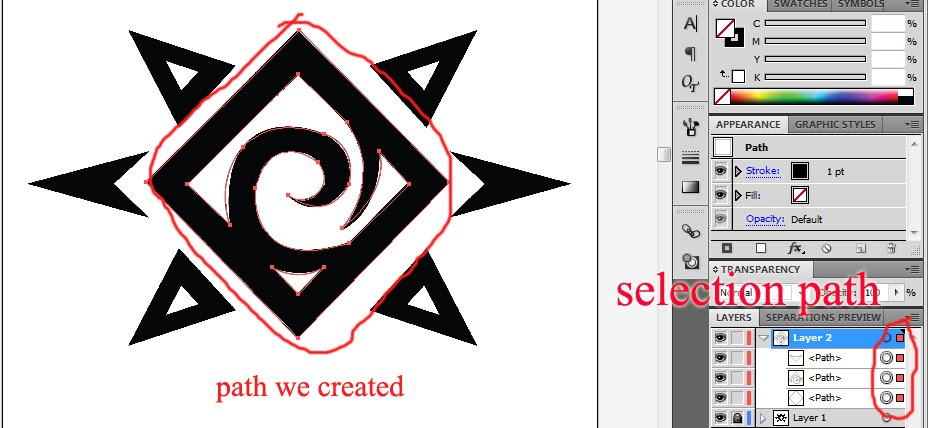
- Make a new layer, so that we do not interfere with the source layer that we will create the path. And lock the layer so that source can not be altered or moved anywhere. It's so easy for us in progress later.
- Select the Pen tool. Previously, we choose a new layer to work on the new layer.

- After that make a line following the outer rectangle, leave like that. Then do a similar path on the inside. When finished choose the path that you have all been created by pressing shift + click to the section you want the selection.
- Once selected all, seek pathfinder like the picture below and choose minus the front. So will form compound objects such as images.

- Then the colored compound with a black object. Compound path do I select the object and choose the desired color.

- Make way 6-9 in the triangle that has a hole in the middle. Pick the top left corner first.
- Copy (Ctrl + C) the triangle to make another triangle, Paste (Ctrl + V) just once. Previously the selection triangle with selection tool (V).
- Right-click copy and then highlight transfrom triangle and choose Reflect. Customize with options such as a picture and click OK.


- Yet .. okay then place the triangle like a copy suitable place in which we trace the source.
- Choose two triangles we have made with the selection tool then copy back.

- Only two more objects that have not we make. I think you can make it because not much different from the one I examplize above.
- Okay, everything has been completed we make. It is time we make a brush.
- Just how easy you just simply selecting all the paths we have made, later open the brush pallete and drag it into the path of brush pallete.

- Brush new window will appear. And choose between three options that exist.
- Scatter Brush. Will create a brush that when we make line / path with a brush formed of brush tool in accordance with the existing path and will not change shape even if we make linenya with a curve or straight line, and if the size that we make are in accordance with a brush that we are setting there will be a path that would follow. Please be creative with your desires in accordance with the options in the window scatter option. Size for size brush, spacing to the distance between the brush, Scatter the path to the location bertaburnya rotate and rotate to change the path.
- Art Brush. Brush with this option will create a path that can rotate or to form a unique path in accordance with the form line that we make with the brush tool. Please be creative with optionnya.
- Pattern brush. Brush option will form like Art Brush, Pattern brush just can not rotate.
Finally ,........
We did it .....
PLEASE be creative !!!!!!!
Please comment ......
indonesian : http://muhammadsyamroni.wordpress.com/2010/08/20/membuat-brush-dengan-illustrator/
Tidak ada komentar:
Posting Komentar